If your current plan is Pro or Premium, congratulations, you can use OmniTrack's GTM Connector! Of course, you need to create a new GTM Container before using it.
Step1. Go to your GTM account, click the "Admin" section and copy the GTM container ID.

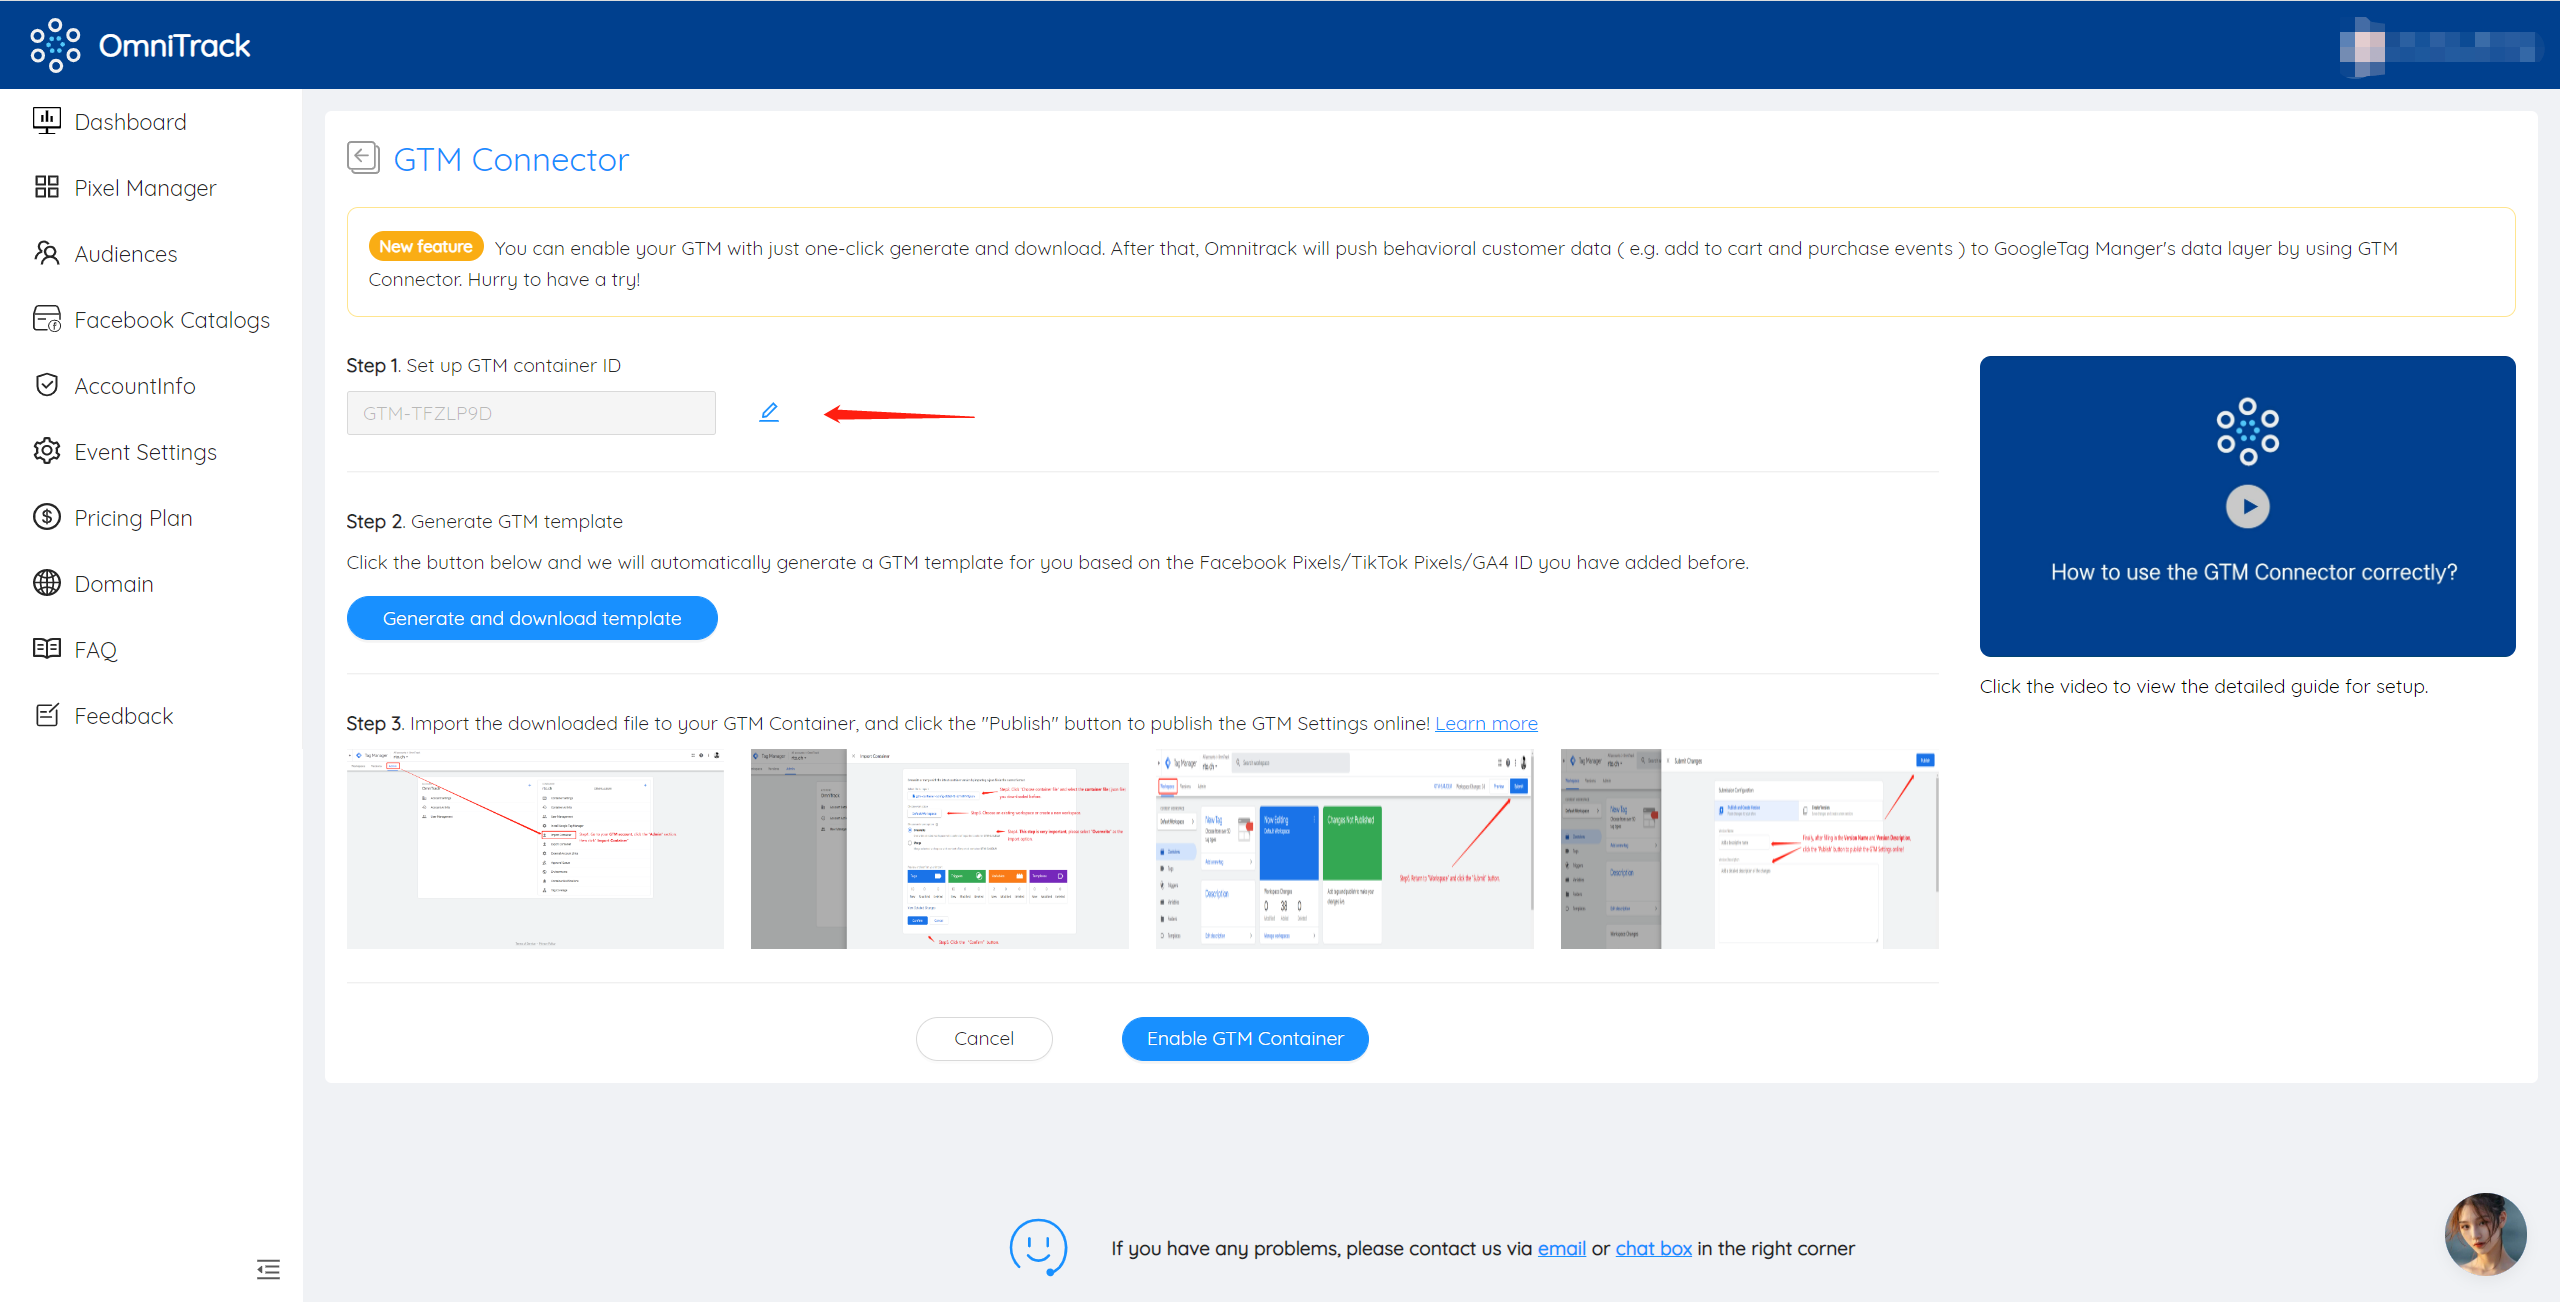
Step2. Back to OmniTrack and paste the GTM container ID into the form.
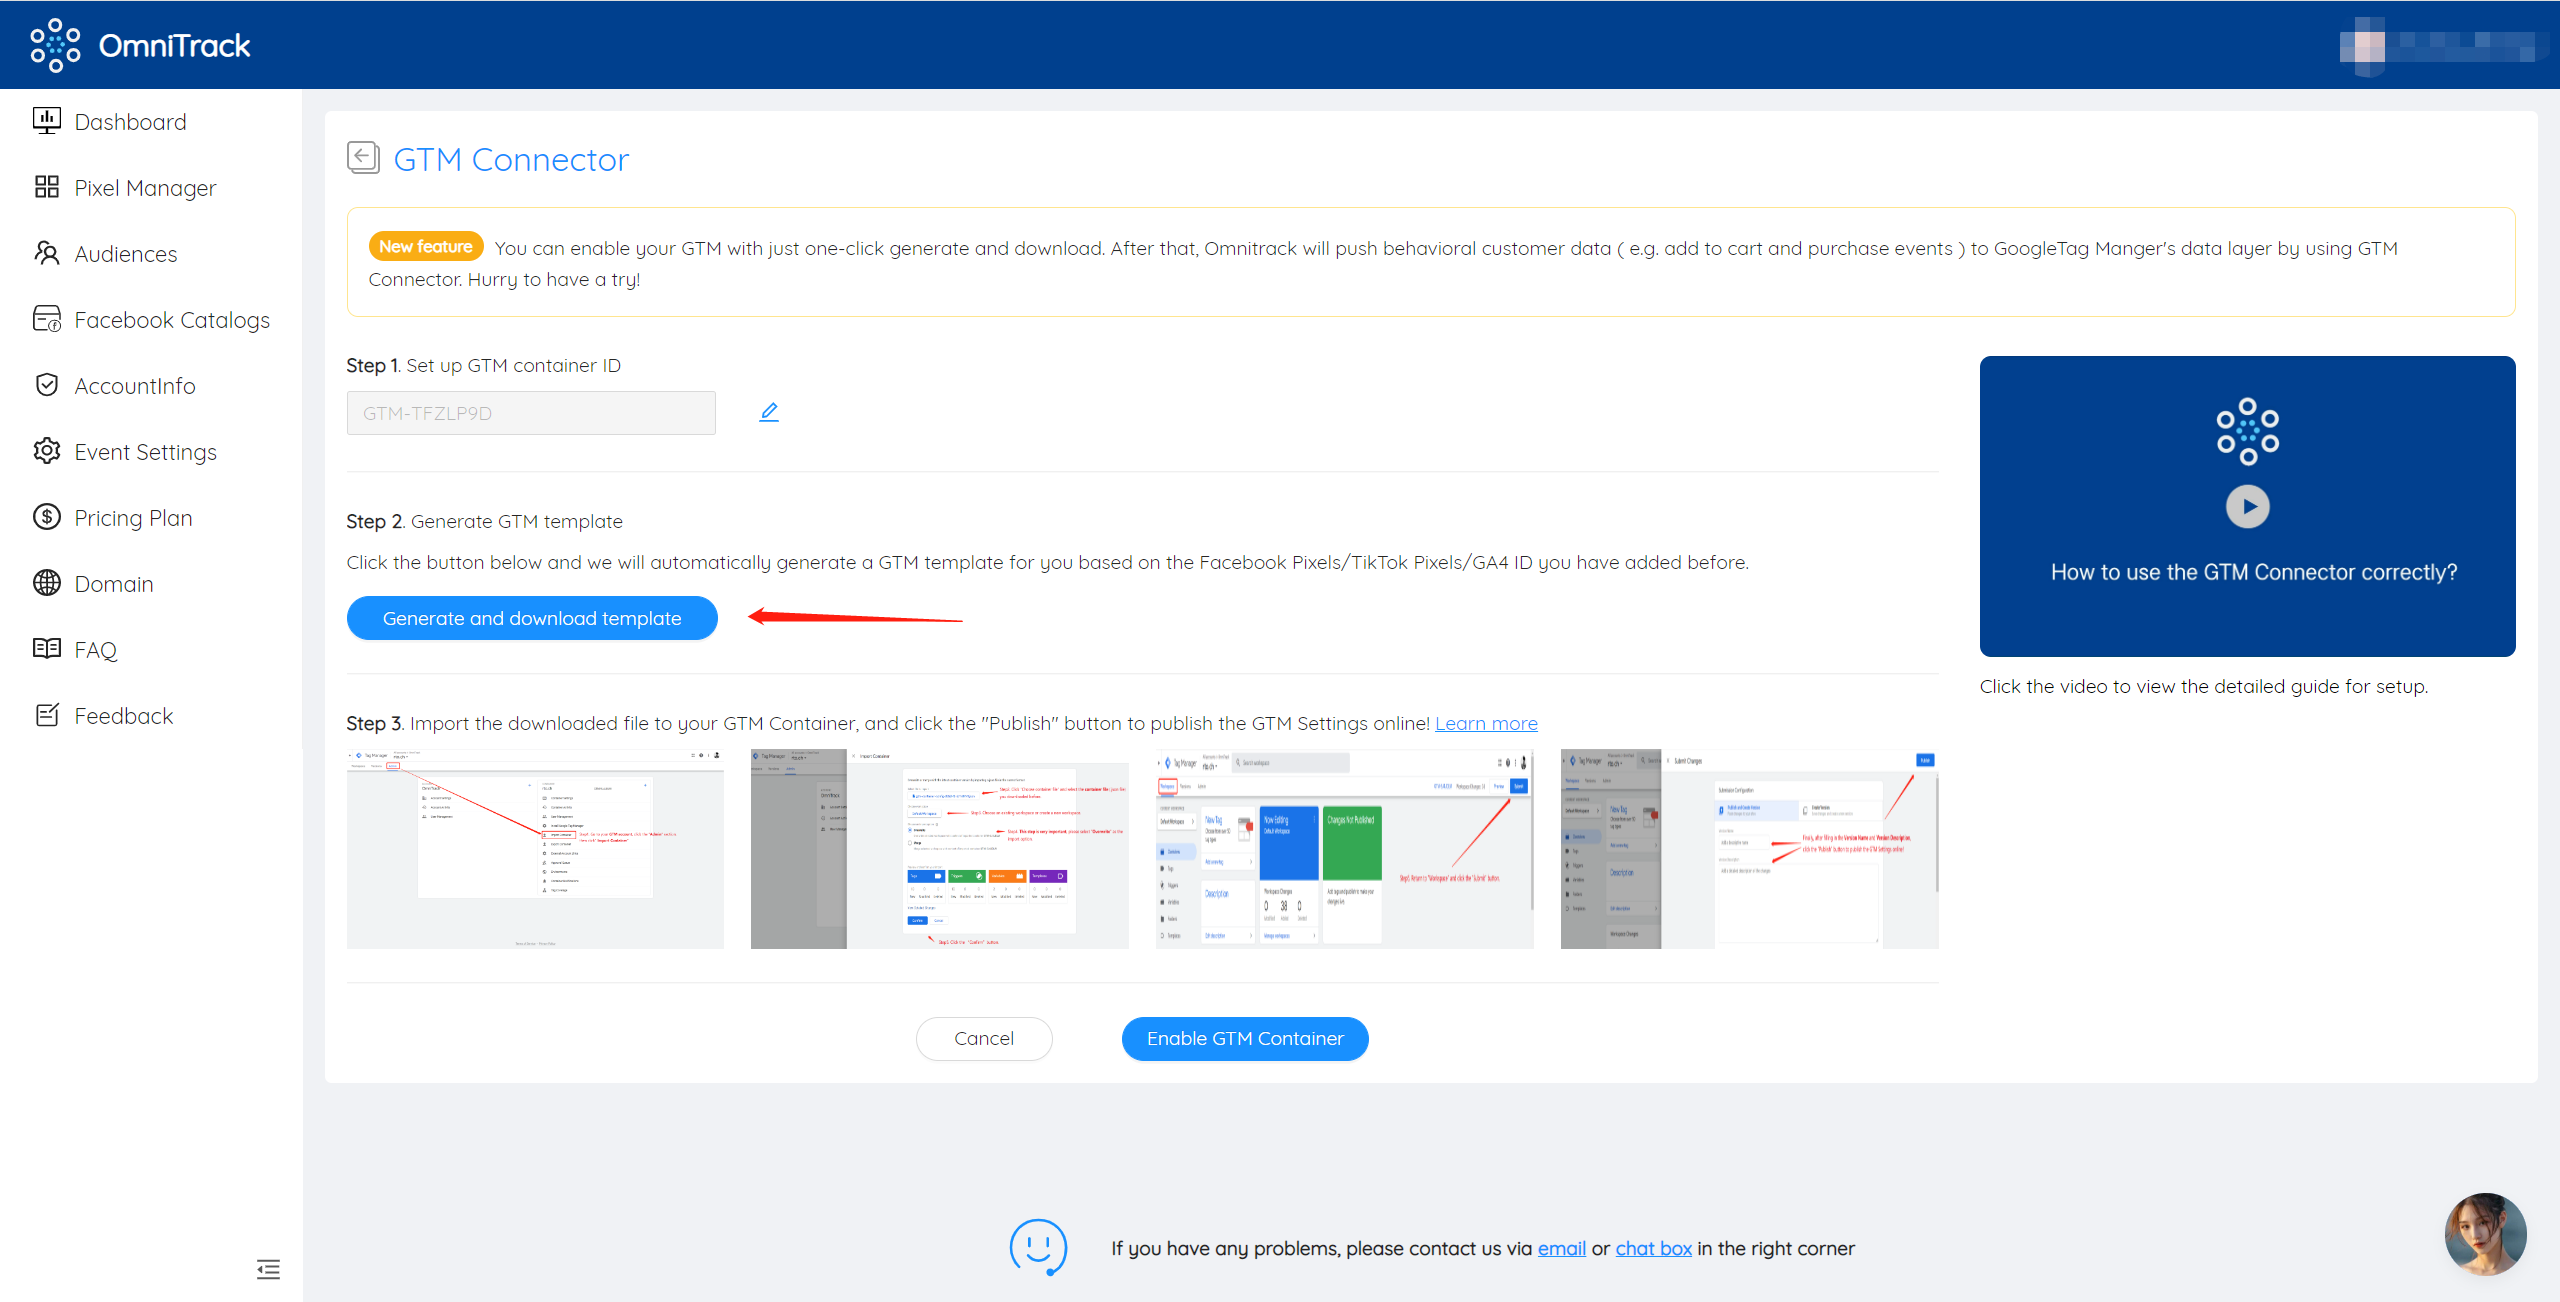
Step3. Click the "Generate and download template" button. OmniTrack will check the Facebook Pixels/TikTok Pixels/GA4 ID you have added before. One container file will be automatically generated and downloaded to your local computer.
Step4. Go to your GTM account, click the "Admin" section, then click "Import Container".

Step5. Click "Choose container file" and select the container file (.json file) you downloaded before.
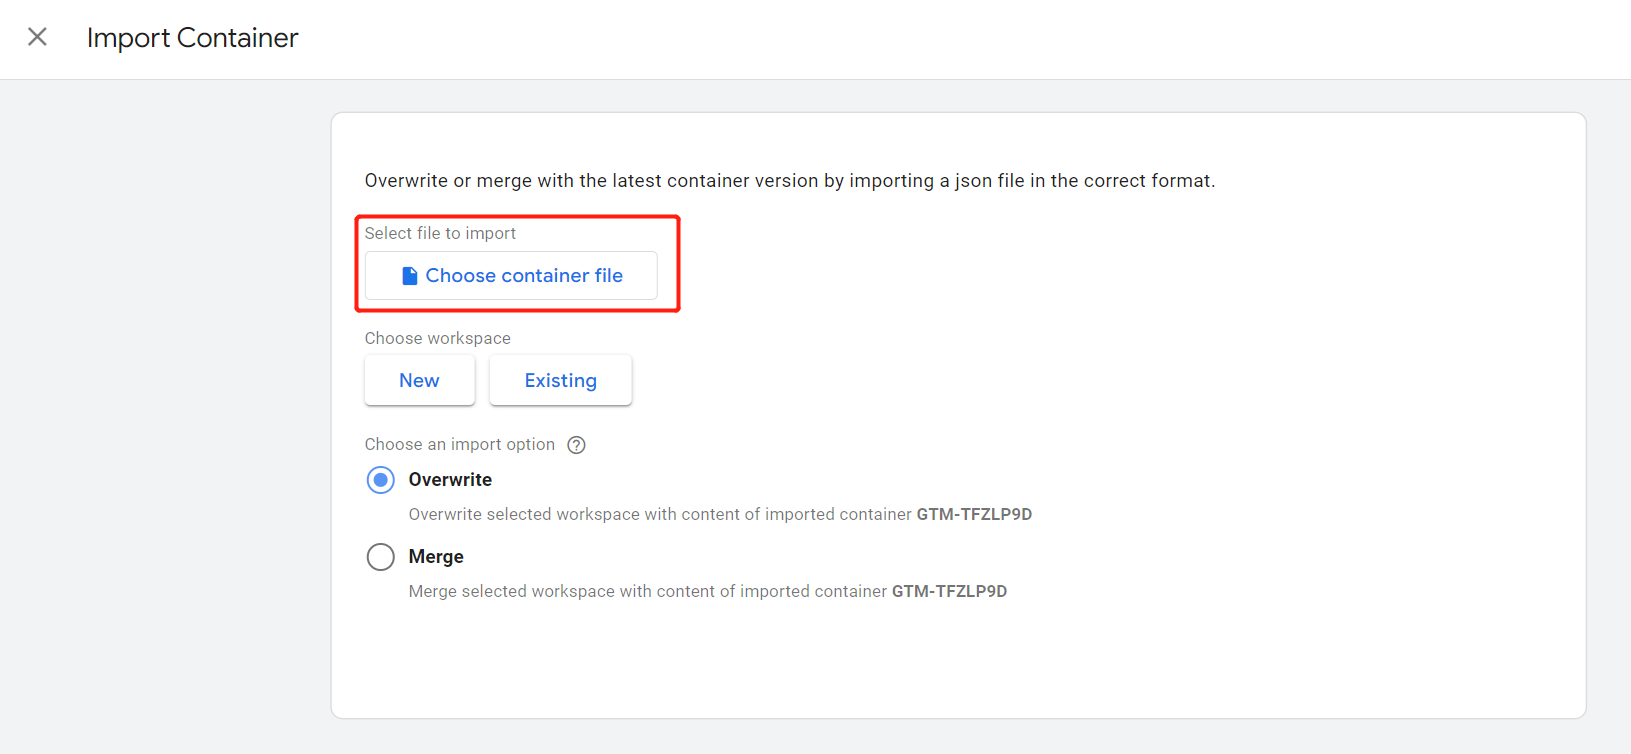
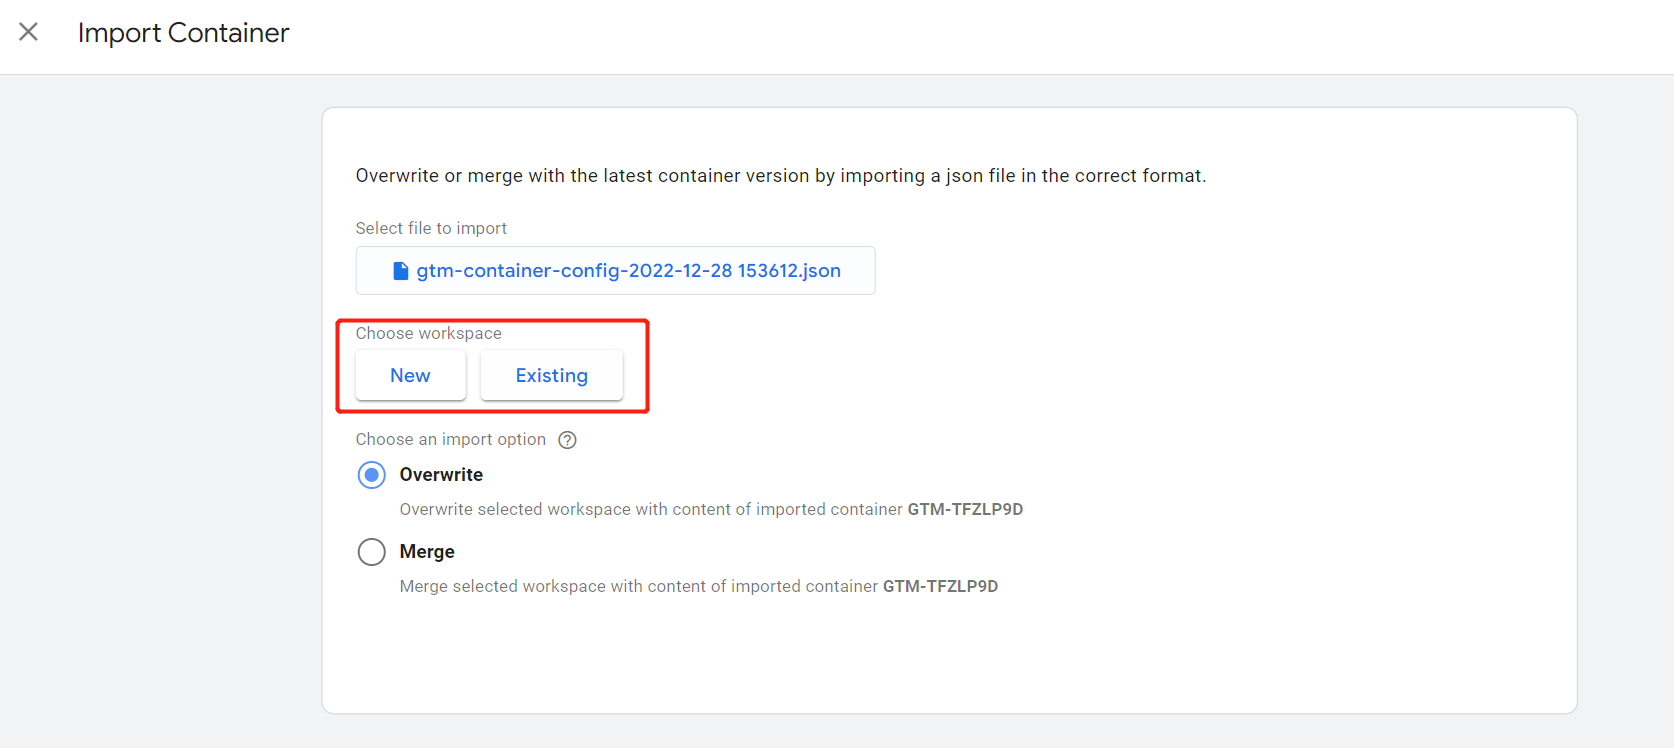
Step6. Choose an existing workspace or create a new workspace.
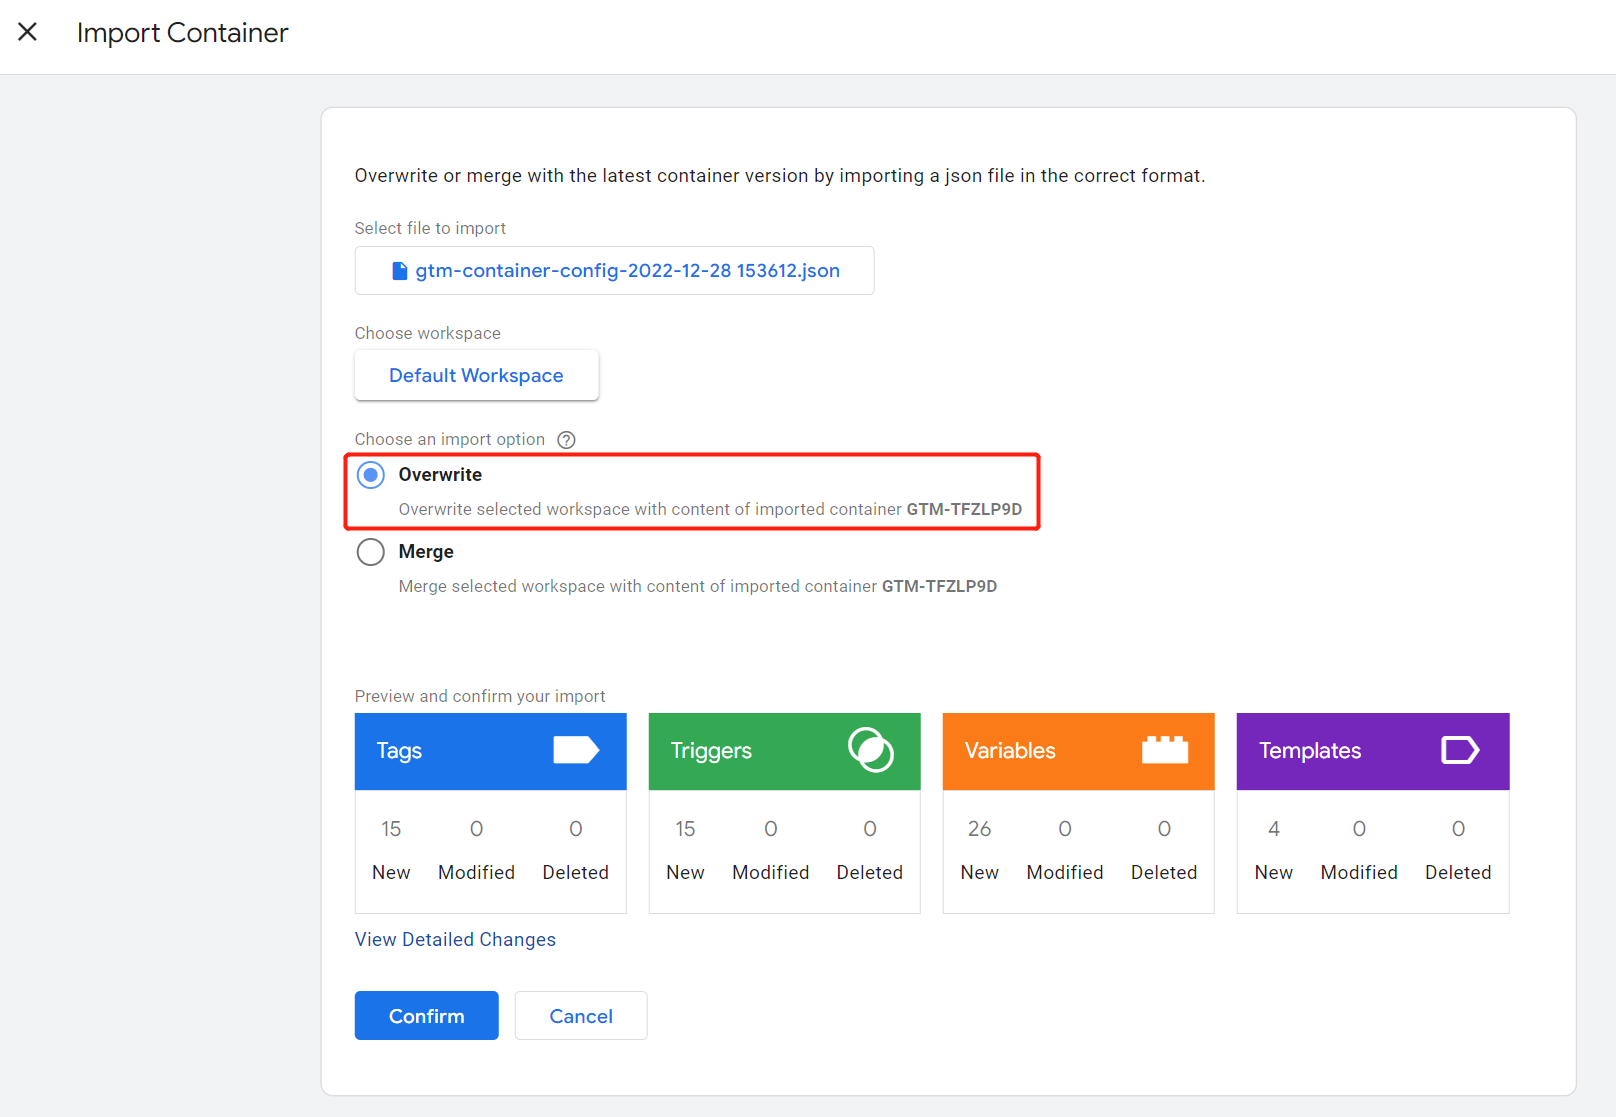
Step7. This step is very important, please select "Overwrite" as the import option.
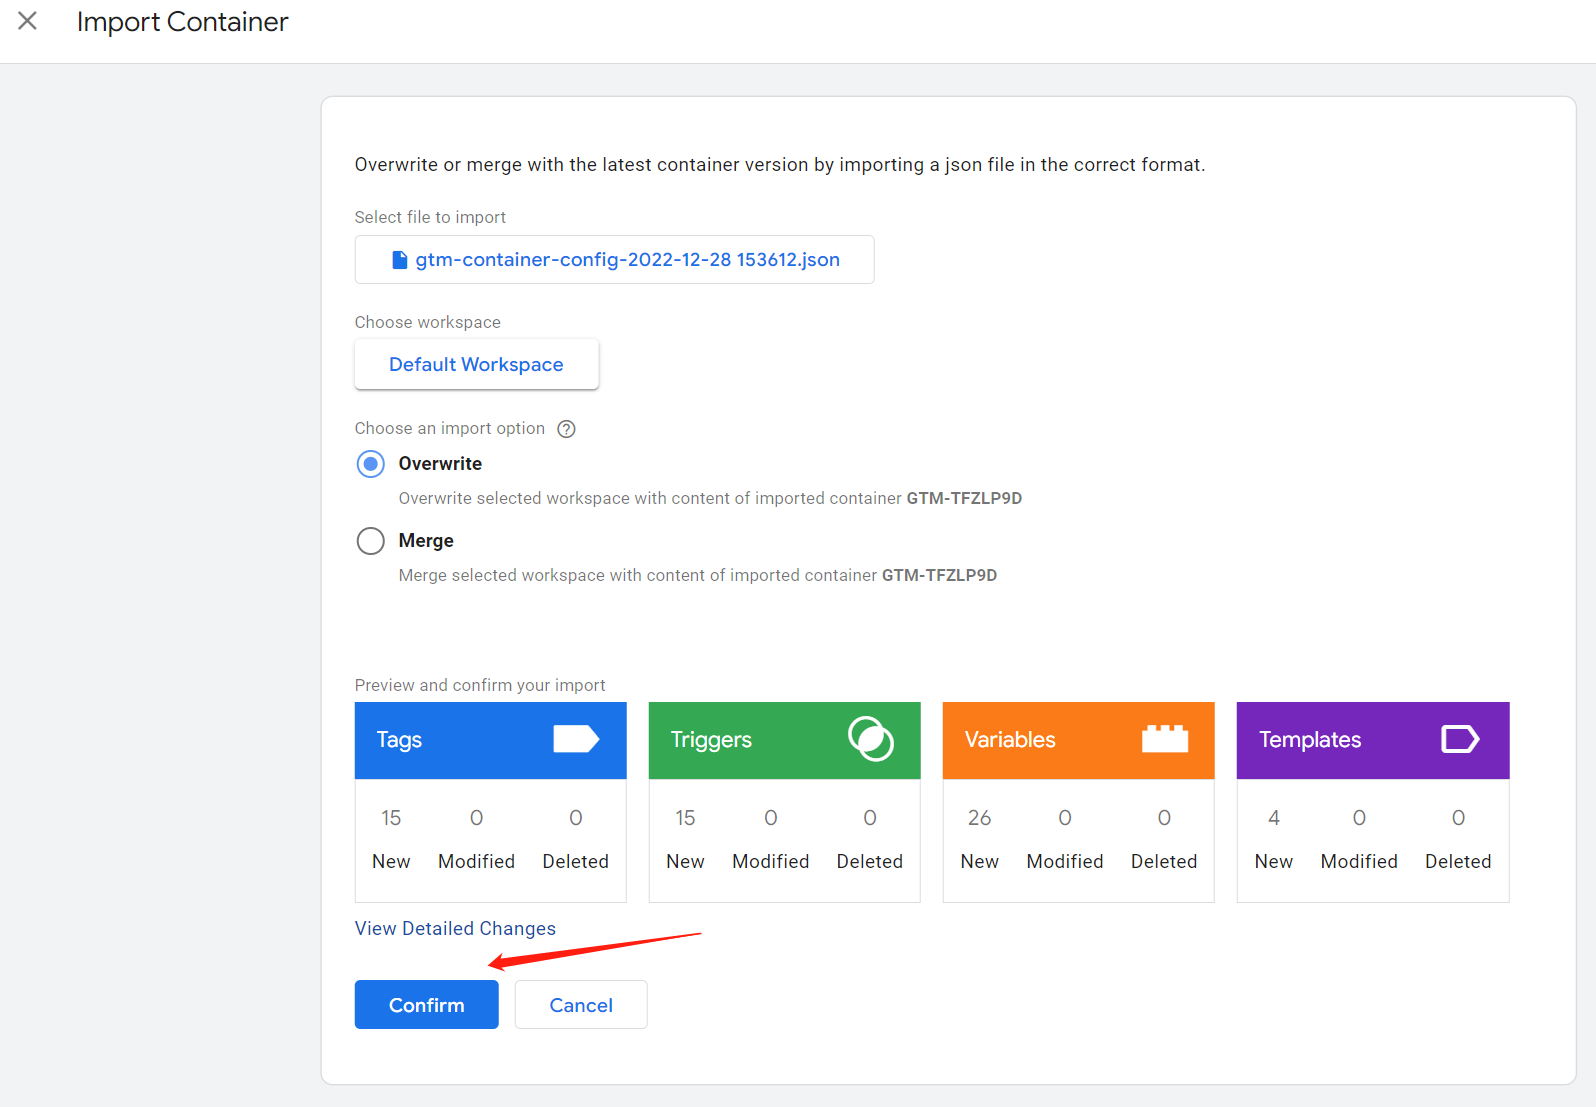
Step8. Click the "Confirm" button.
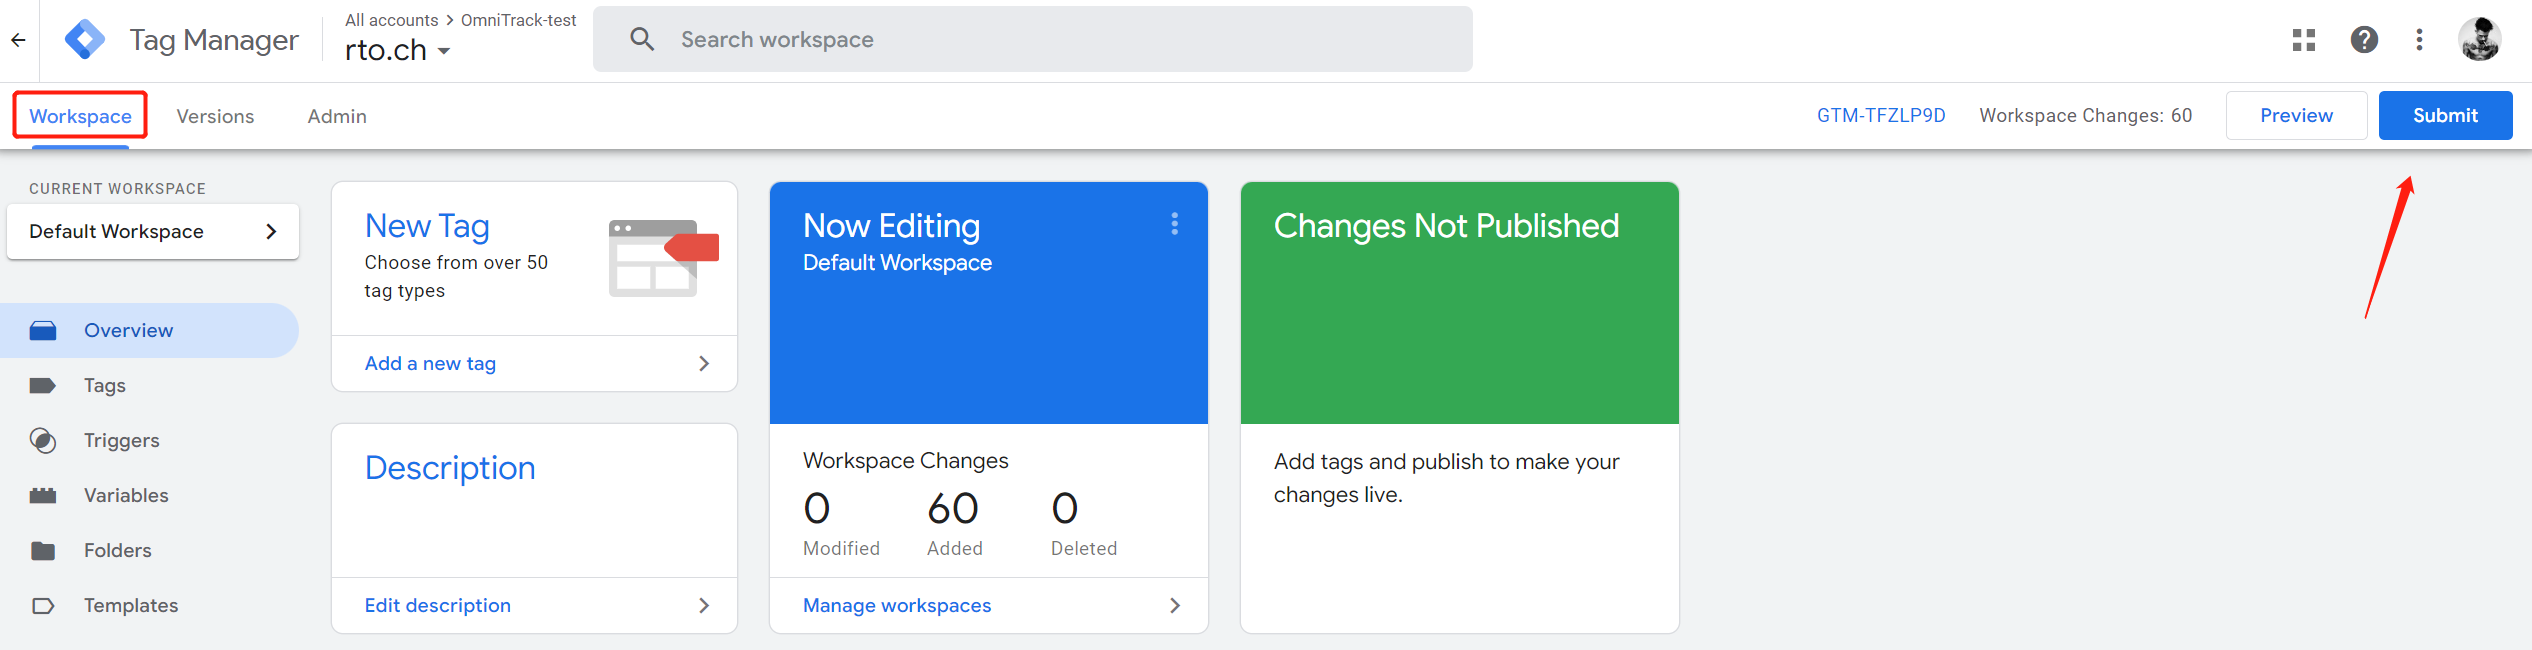
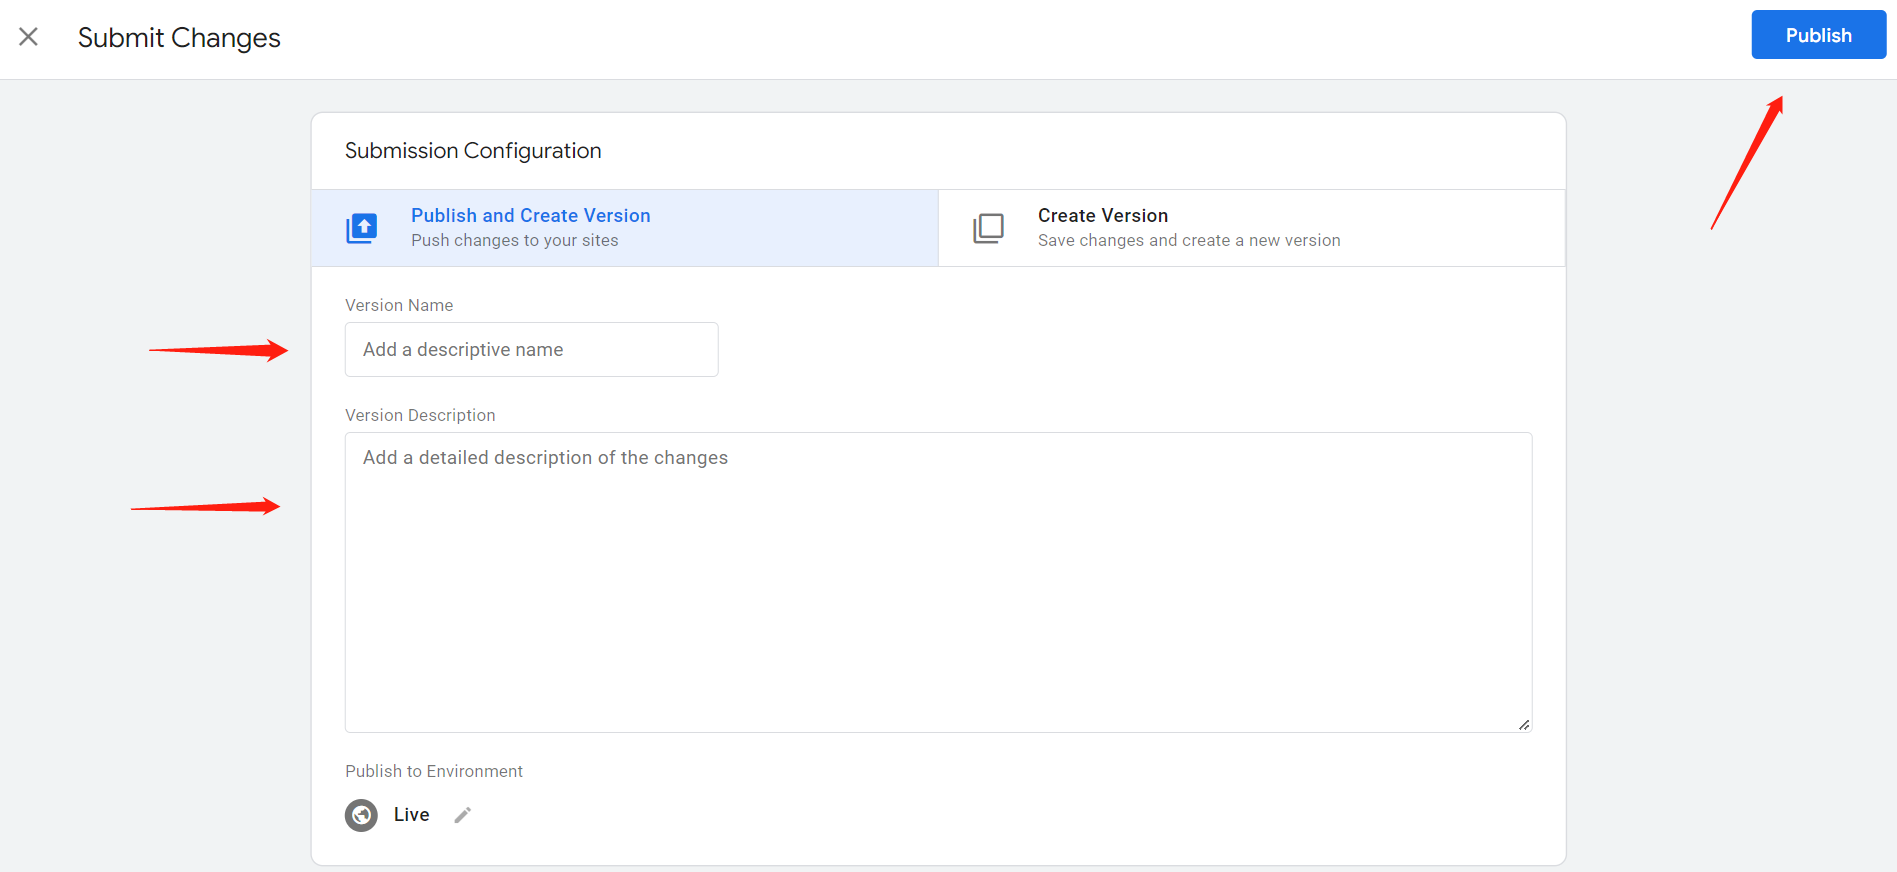
Step9. Return to "Workspace" and click the "Submit" button.
Step10. After filling in the Version Name and Version Description, click the "Publish" button to publish the GTM Settings online!
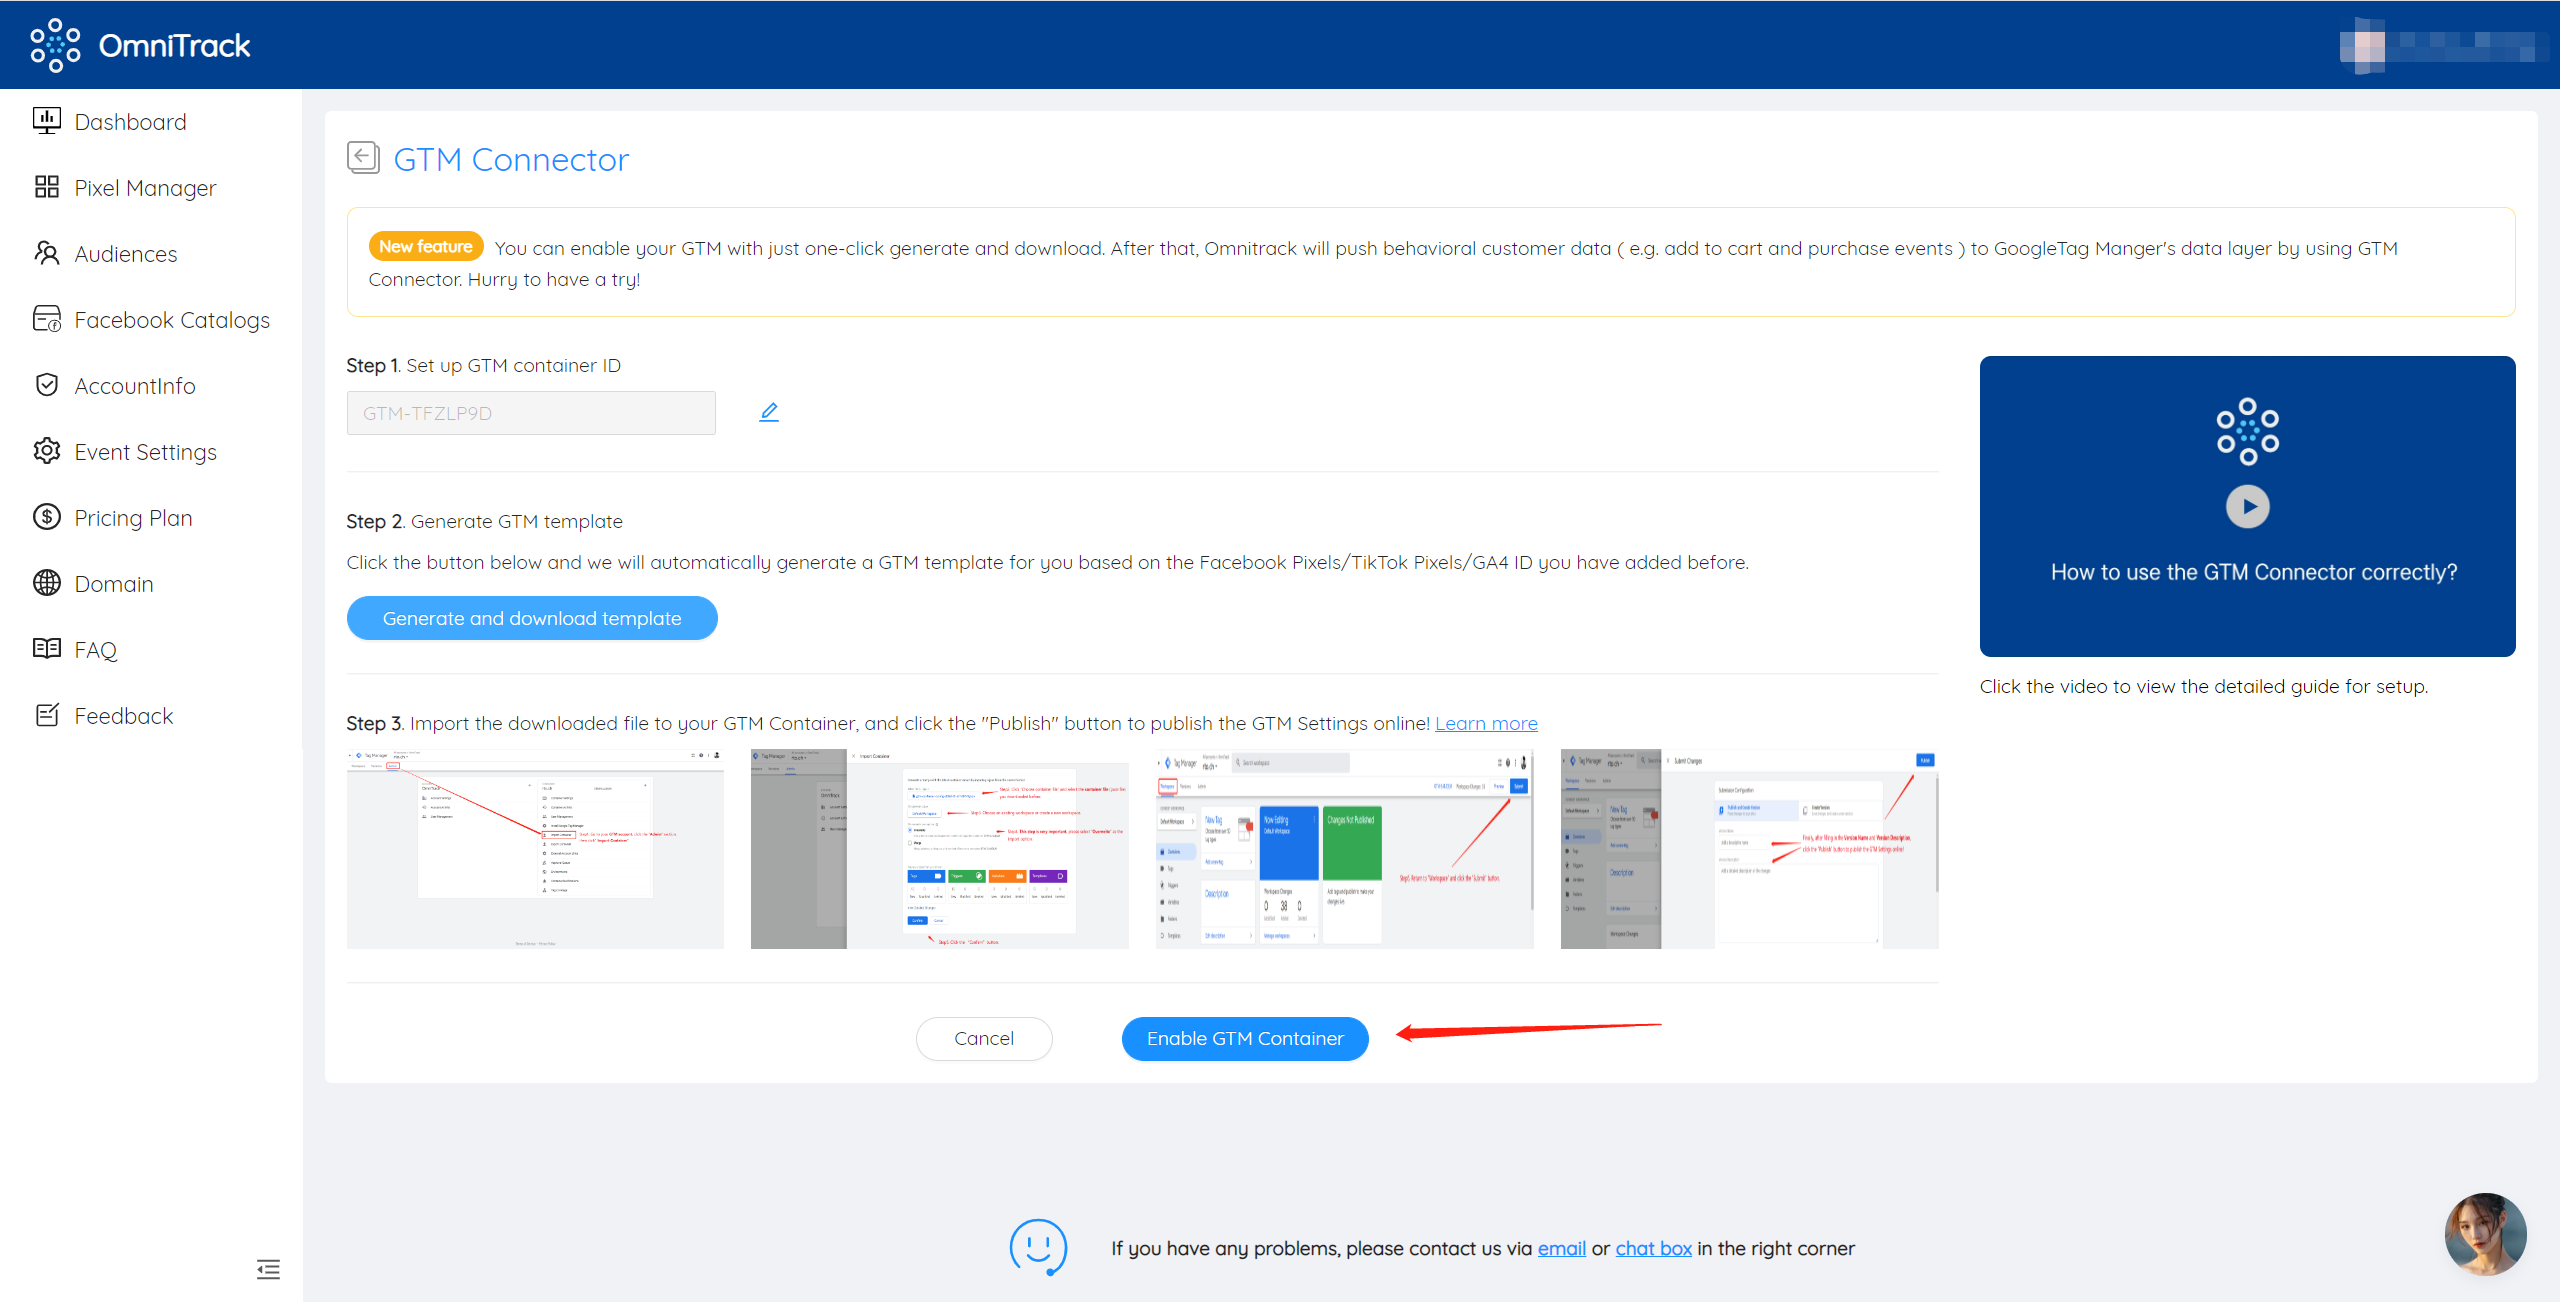
Step11. Go back to OmniTrack and click the "Enable GTM container" button.
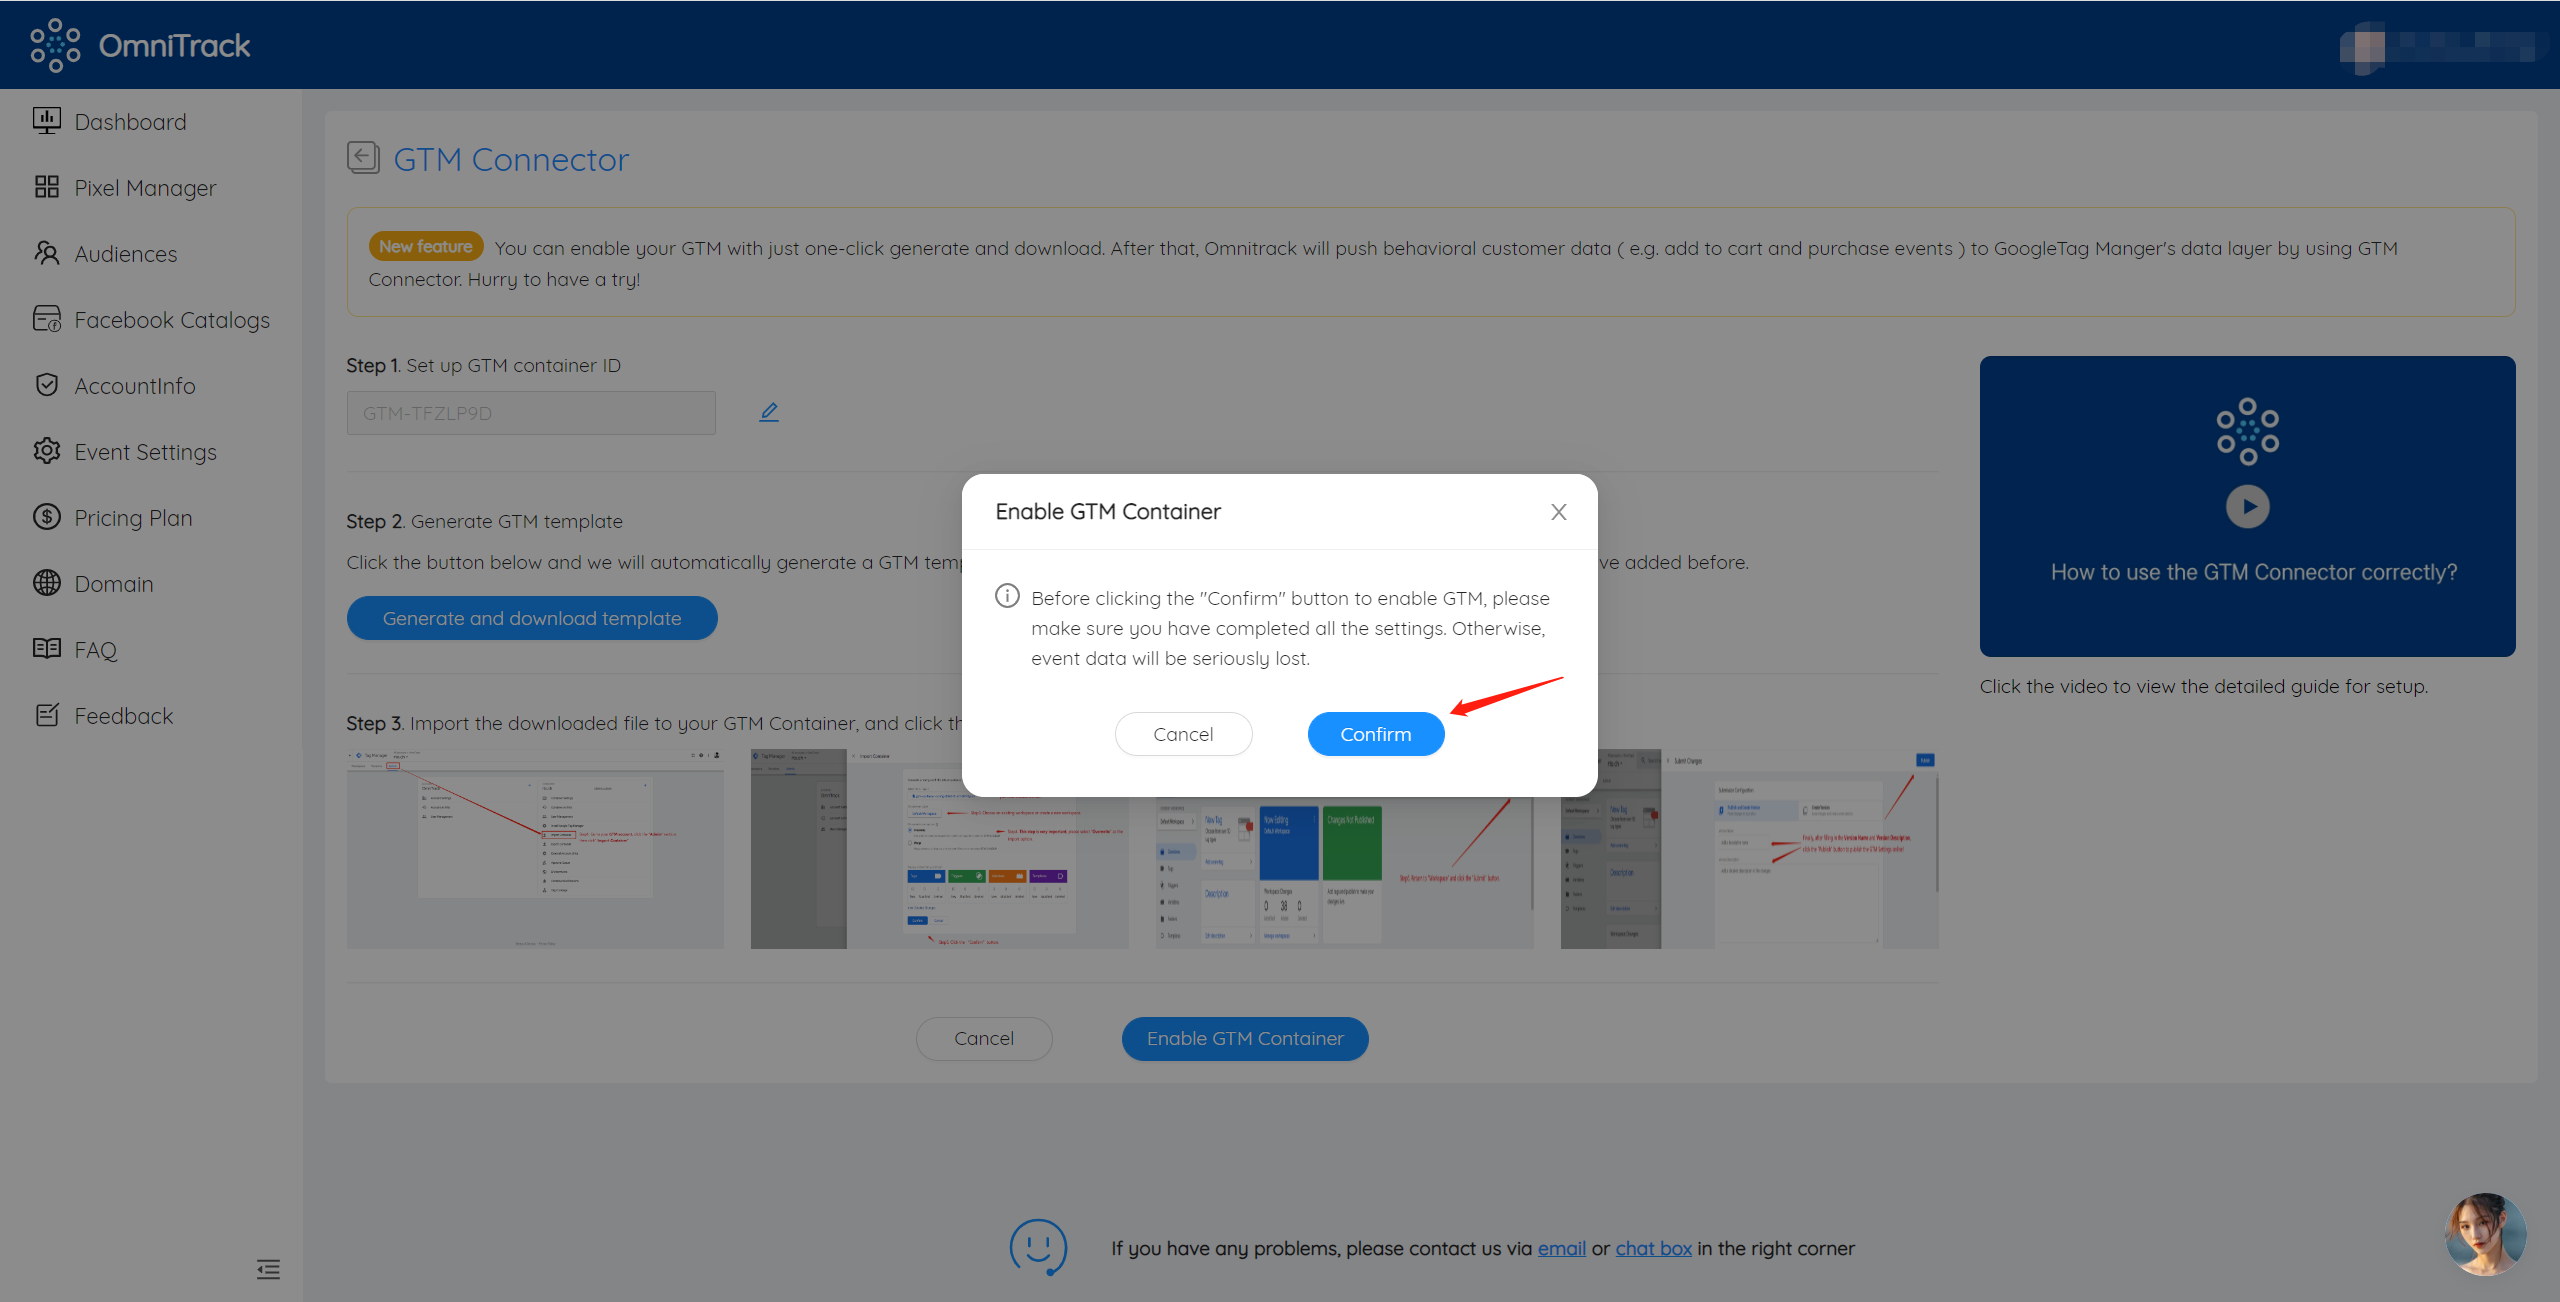
Finally, click the "Confirm" button. Then, Omnitrack will push behavioral customer data ( e.g. add to cart and purchase events ) to Google Tag Manager's data layer by using GTM Connector.
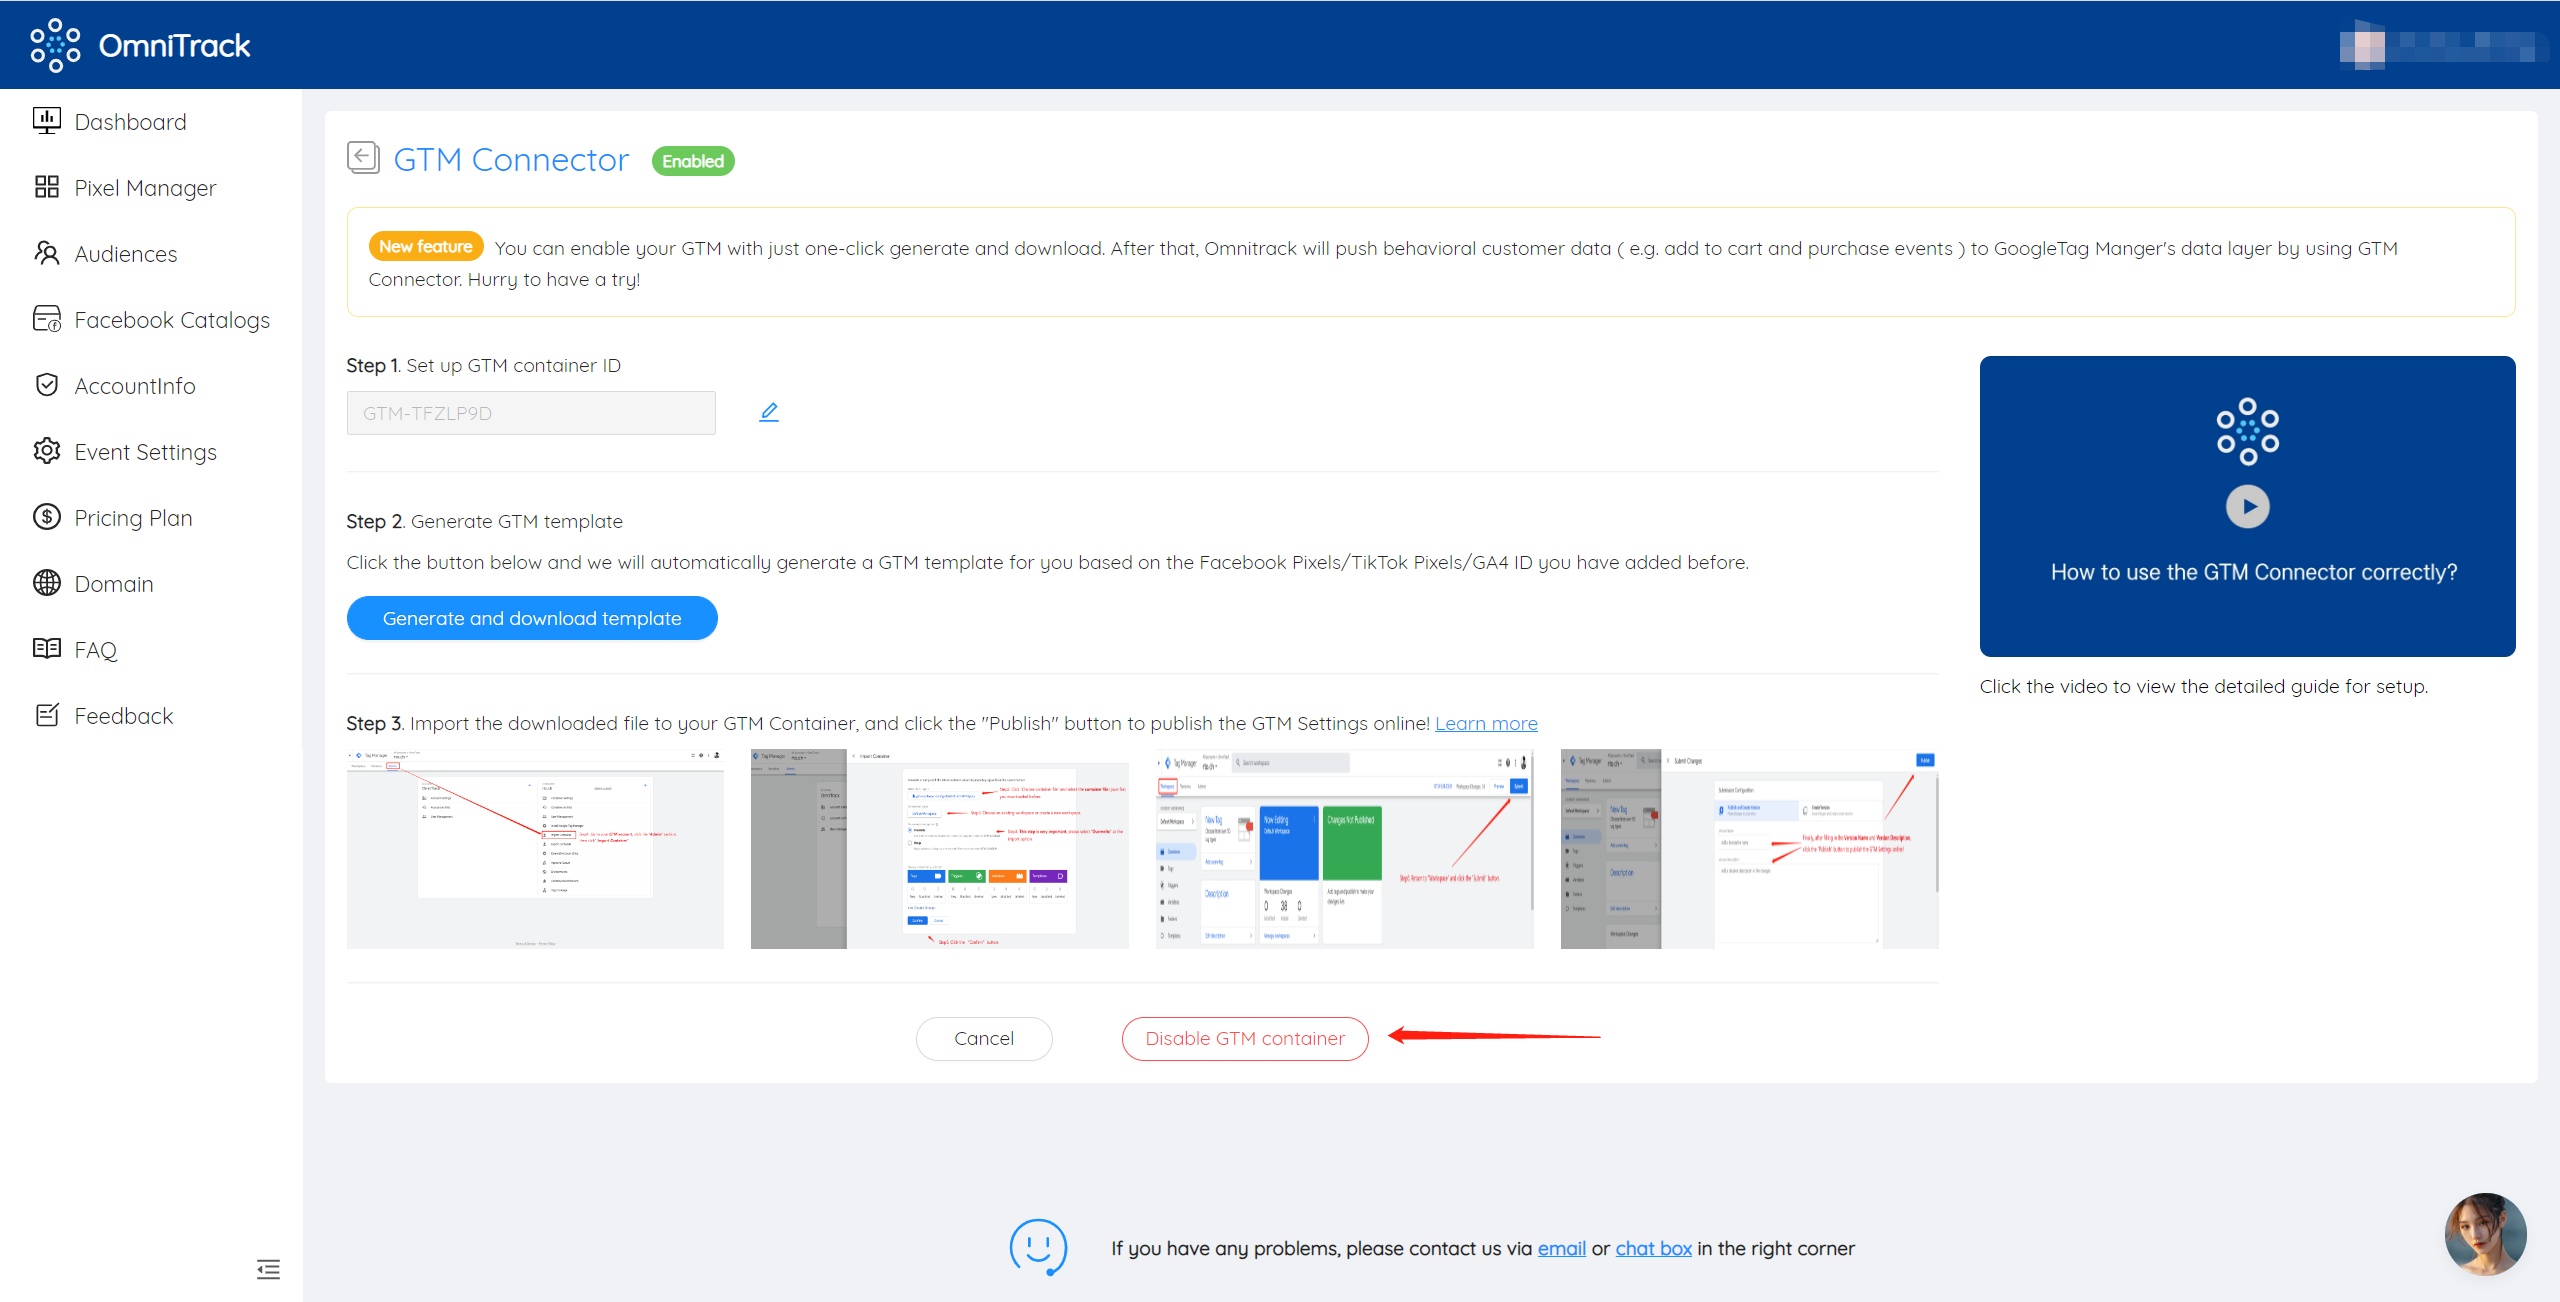
If you do not want to use GTM Connector to push customer behavior data to Google Tag Manager's Data Layer and then GTM to push customer behavior data to Facebook/TikTok/GA4, you can click the "Disable GTM container" button.
Then OmniTrack would push customer behavior data directly to Facebook/TikTok, and GA4 would not receive customer behavior data because GA4 would have to use the GTM connector.